No Knead Bread Recipe for Beginners | Easy, Crusty Homemade Loaf
Making bread at home has a special kind of magic. The scent that fills the kitchen, the crackle of a crisp crust as it cools, and the satisfaction of slicing into a loaf you made from scratch—these are pleasures that store-bought bread simply can’t match. But for many home cooks, the idea of making bread feels intimidating. Kneading dough, waiting for it to rise just right, and mastering the texture all sound like a science experiment gone wrong.
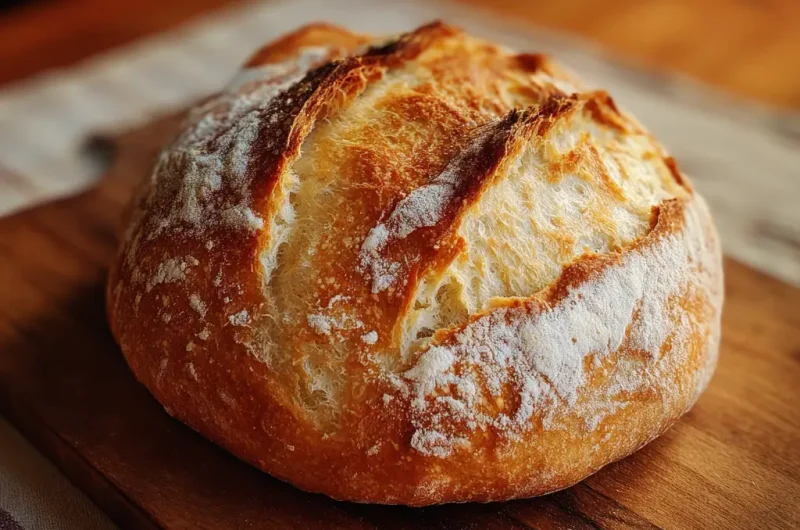
Enter no knead bread—a recipe that flips everything you think you know about bread baking. You don’t need fancy mixers, strong arms, or years of baking experience. With a few simple ingredients and a bit of patience, you can bake a rustic, artisan-style loaf right in your home oven. The crust turns golden and crunchy, the interior stays soft and chewy, and the flavor deepens with every hour the dough rests.
No knead bread is perfect for beginners but also loved by experienced bakers who appreciate its simplicity and consistent results. Whether you’re making it for a casual dinner, to impress guests, or just to fill your home with the unbeatable smell of fresh bread, this recipe delivers every time.
Ingredients Needed
Here’s a simple list of what you’ll need to make no knead bread. All ingredients are pantry staples, making it easy to whip up a loaf any day of the week.
| Ingredient | Quantity | Calories (Approx) |
|---|---|---|
| All-purpose flour | 3 cups (375g) | 1200 |
| Water | 1.5 cups (355ml) | 0 |
| Salt | 1.5 teaspoons | 0 |
| Instant yeast | 0.25 teaspoon | 1 |
Total Calories Per Loaf: Approximately 1201
Note: Calories may vary slightly depending on the brand of ingredients used.
Step-by-Step Cooking Instructions
Making no knead bread is more about timing than technique. Follow these steps for a beautiful loaf every time.
1. Mix the dough
In a large mixing bowl, combine the flour, salt, and yeast. Add the water and stir with a wooden spoon or silicone spatula until a shaggy, sticky dough forms. It will look rough and messy, but that’s exactly what you want.
2. Cover and rest
Cover the bowl with plastic wrap or a clean kitchen towel. Let the dough rest at room temperature for 12 to 18 hours. This slow fermentation helps the gluten develop naturally, creating that perfect chewy texture without kneading.
3. Shape the dough
Once the dough has risen and looks bubbly on the surface, dust a clean surface with flour. Gently turn the dough out onto the floured area. With floured hands, fold it over on itself a few times, forming a rough ball. You don’t need to be precise.
4. Second rise
Place the dough seam-side down on a piece of parchment paper. Cover it loosely with a towel and let it rise again for about 1 to 2 hours. It should puff up slightly.
5. Preheat the oven and pot
While the dough is on its second rise, preheat your oven to 450°F (230°C). Place a Dutch oven (or heavy oven-safe pot with a lid) inside as it heats. Let the pot get really hot—this step is key for a crusty finish.
6. Bake the bread
When the dough is ready, carefully remove the hot pot from the oven. Use the parchment paper to lift the dough and place it directly into the pot. Cover with the lid and bake for 30 minutes.
After 30 minutes, remove the lid and bake for another 10 to 15 minutes. This helps develop a deep golden crust.
7. Cool before slicing
Take the bread out of the pot and let it cool on a wire rack. It’s tempting to slice it right away, but waiting at least 30 minutes helps the inside finish setting up.
Tips for Customizing the Recipe
One of the best parts about no knead bread is how flexible it is. Here are a few ways to make it your own:
Use whole wheat flour
Replace up to half the all-purpose flour with whole wheat for a nutty, wholesome flavor. Just know the texture may be slightly denser.
Add mix-ins
Try stirring in chopped olives, shredded cheese, herbs like rosemary, or even roasted garlic. Add them during the initial mix step.
Try different flours
Experiment with bread flour for a chewier texture or rye flour for a hearty, earthy loaf.
Use flavored liquids
Substitute some of the water with beer or buttermilk for added depth.
Make it sweet
Add a tablespoon of sugar or honey and toss in raisins, cinnamon, or chopped nuts for a breakfast-style version.
Nutritional Information
Each loaf serves about 8 to 10 slices. Here’s a rough breakdown per slice:
This is a basic, healthy bread with no added fats or sugars. If you customize it with extras like cheese or dried fruit, the nutritional values will change accordingly.
Serving Suggestions
Fresh no knead bread is incredibly versatile. Serve it alongside soups and stews, use it as a base for sandwiches, or toast slices with butter and jam for a comforting breakfast.
It also makes a fantastic appetizer when sliced and served with olive oil and balsamic vinegar. For something more indulgent, turn thick slices into French toast or grilled cheese sandwiches.
Leftovers can be stored at room temperature for up to three days. Just keep it wrapped in a kitchen towel or in a paper bag to preserve the crust. Avoid plastic wrap, which makes the crust soggy. You can also freeze slices for up to two months and toast straight from the freezer.
No Knead Bread Recipe for Beginners | Easy, Crusty Homemade Loaf
Course: Blog8
servings10
minutes40
minutes~150
kcalIngredients
3 cups (375g) all-purpose flour
1½ cups (355ml) water (room temperature)
1½ teaspoons salt
¼ teaspoon instant yeast
Directions
- Mix the Dough
- In a large bowl, stir together the flour, salt, and yeast. Pour in the water and mix with a spoon until a shaggy dough forms. The dough will be sticky and rough-looking.
- Let It Rest
- Cover the bowl with plastic wrap or a clean towel. Let it sit at room temperature for 12 to 18 hours. The dough will rise and become bubbly.
- Shape the Dough
- Lightly flour a surface and gently turn the dough out. Fold it over on itself a few times. Shape it into a loose ball using floured hands.
- Second Rise
- Place the dough seam-side down on a piece of parchment paper. Cover with a towel and let it rise for 1 to 2 hours until slightly puffy.
Recipe Video
Notes
- For best results, avoid slicing the bread while it’s hot. Letting it cool helps the crumb set fully. You can store the loaf at room temperature in a paper bag for up to three days, or freeze slices for longer storage.
Frequently Asked Questions
Can I use active dry yeast instead of instant yeast?
Yes, but you’ll need to dissolve it in a bit of warm water first. Let it sit for about 5 to 10 minutes before adding it to the flour mixture.
Is it really necessary to use a Dutch oven?
A Dutch oven traps steam during baking, which is crucial for getting that crackly crust. If you don’t have one, you can use a baking dish with a lid or place a pan of hot water in the oven to create steam.
Can I make the dough ahead and bake it later?
Yes. After the initial rise, you can shape the dough and refrigerate it for up to 24 hours before baking. Let it come to room temperature and rise a bit more before putting it in the oven.
Why didn’t my bread rise properly?
Old yeast or cold environments can slow down the fermentation. Make sure your yeast is fresh and your kitchen stays warm enough during the resting period.
How can I make the crust softer?
If you prefer a softer crust, cover the bread with a clean towel as it cools. This traps steam and softens the outer layer.
Conclusion
Baking no knead bread at home is one of the most rewarding kitchen experiences you can have. With minimal effort and no special skills required, you get a loaf that rivals artisan bakery bread in both taste and texture. Whether you’re new to bread making or simply want a reliable recipe that works every time, this no knead method is a must-try.