Cheese Recipe: Easy Homemade Cheese Making Guide for Beginners
Introduction
Cheese has long been a beloved staple in kitchens worldwide, prized for its creamy texture and rich flavor. Making cheese at home offers a unique satisfaction, blending culinary art with science. It invites you to slow down and savor the process, transforming simple ingredients into something extraordinary. Crafting your own cheese allows you to customize flavors and textures in ways store-bought options cannot match. The freshness and control over ingredients also mean you can avoid unwanted preservatives and additives. For those who appreciate cooking as an experience and a creative outlet, a homemade cheese recipe opens the door to endless possibilities. Whether you aim for a soft, spreadable cheese or a firmer variety, the journey from milk to cheese is both rewarding and enjoyable.

Ingredients Needed
Creating cheese requires just a handful of essential ingredients. Using high-quality components ensures the best results, and knowing the calorie content helps keep track of nutritional intake. Below is a clear table listing the ingredients along with their corresponding calorie counts per typical serving sizes.
| Ingredient | Quantity | Calories (Approx.) |
|---|---|---|
| Whole Milk | 1 gallon (3.8 L) | 2400 |
| Lemon Juice or Vinegar | 1/4 cup (60 ml) | 15 |
| Salt | 1 teaspoon | 0 |
| Optional: Herbs or Spices | To taste | Varies |
Using whole milk creates a rich and creamy cheese, while lemon juice or vinegar acts as a natural curdling agent. Salt enhances flavor and helps preserve the cheese. Optional herbs like chives, dill, or garlic powder can be added for extra taste, creating your own signature cheese blend.
Step-by-Step Cooking Instructions
Preparing cheese at home might sound complex, but it becomes quite straightforward when broken down into manageable steps. Follow this guide to create fresh, delicious cheese from scratch.
- Heat the Milk
Pour the whole milk into a large pot and slowly heat it over medium heat. Stir occasionally to prevent burning. Aim for a temperature of about 185 degrees Fahrenheit (85 degrees Celsius). Use a thermometer for accuracy to avoid overheating. - Add the Acid
Once the milk reaches the desired temperature, remove it from heat. Slowly stir in the lemon juice or vinegar. This will cause the milk to curdle and separate into curds and whey. Let the mixture sit undisturbed for 10 to 15 minutes until curds fully form. - Strain the Curds
Line a colander with cheesecloth or a clean, thin kitchen towel. Carefully pour the curdled milk into the colander to separate the curds from the whey. Allow the whey to drain naturally. For firmer cheese, gently press the curds to remove excess liquid. - Add Salt and Mix
Transfer the curds to a bowl and mix in salt to taste. This step improves flavor and acts as a preservative. If desired, stir in herbs or spices now to infuse the cheese with unique flavors. - Shape and Refrigerate
Pack the cheese mixture into a mold or form it by hand. Cover it with plastic wrap and refrigerate for several hours, preferably overnight. Chilling helps the cheese solidify and develop a better texture.“Is delicious Cheese Recipe mein aap Baked Cheesecake Recipe ke creamy texture ka maza le sakte hain, jo ek perfect sweet Casserole dessert banata hai.” - Enjoy
After chilling, your homemade cheese is ready to be sliced, spread, or crumbled. Store it in an airtight container in the fridge for up to one week.

Tips for Customizing the Recipe
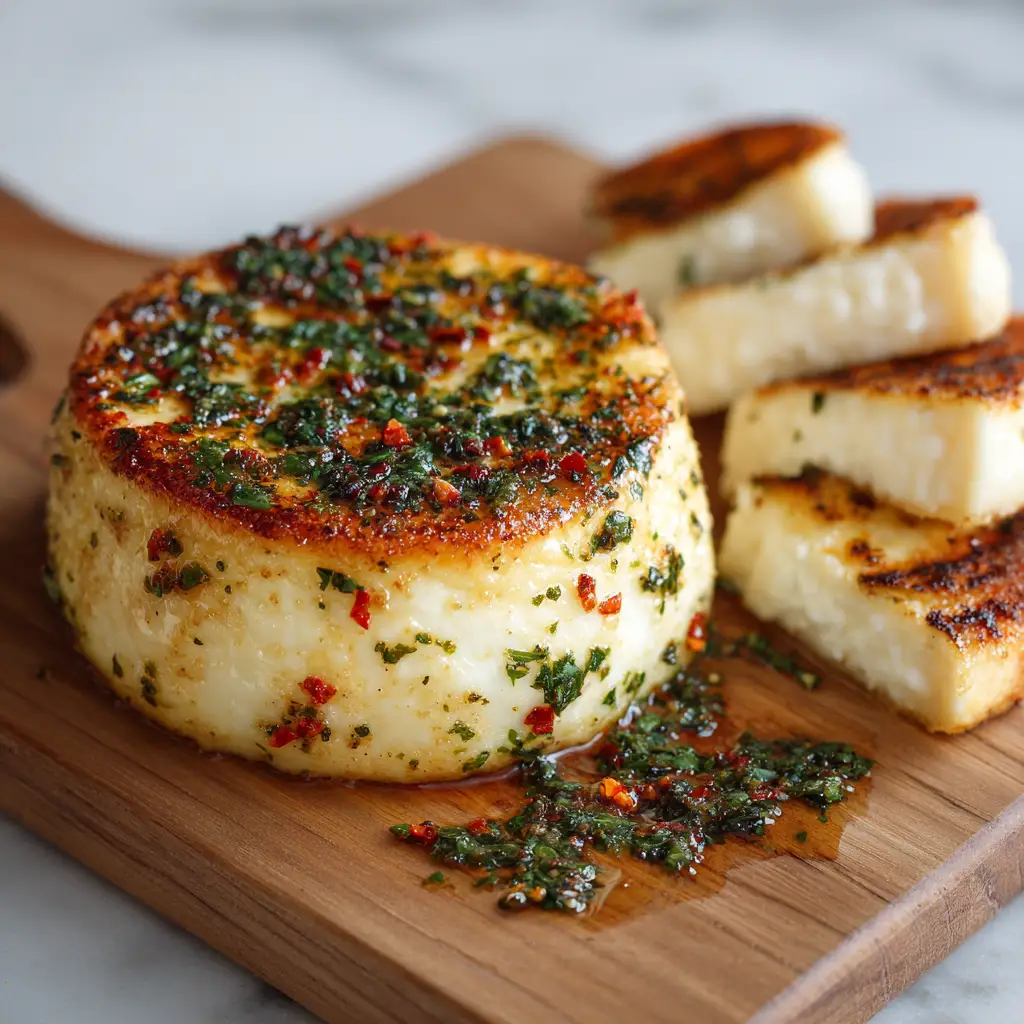
Cheese making is highly versatile, allowing for countless adaptations based on personal preference. Experimenting with different acids like white vinegar or even yogurt can alter the flavor profile. Using milk with different fat contents affects creaminess; for example, full-fat milk produces richer cheese, while lower-fat milk yields a lighter product. Adding fresh herbs such as basil or thyme transforms simple cheese into an aromatic delight. Spices like smoked paprika or cracked black pepper introduce subtle heat and complexity. For creamier varieties, incorporating a bit of cream or straining the cheese less intensively keeps more moisture. Adjusting the pressing time controls firmness; longer pressing results in denser cheese, while minimal pressing preserves softness. Cheese making also invites exploration with aging techniques, though fresh cheeses are usually enjoyed immediately. Keeping notes on each batch helps refine your method and discover your favorite combinations.
Nutritional Information
Understanding the nutritional value of homemade cheese is helpful for maintaining a balanced diet. This fresh cheese mainly consists of protein, fat, and calcium. Protein supports muscle repair and growth, while calcium strengthens bones and teeth. Using whole milk gives a good source of vitamins A and D, which are fat-soluble and important for immune function and vision. One serving, approximately 2 ounces (56 grams), contains roughly:
- Calories: 150 to 180
- Protein: 8 to 10 grams
- Fat: 12 to 15 grams
- Carbohydrates: 1 to 2 grams
- Calcium: About 200 milligrams
Salt content varies depending on how much you add during preparation, so monitor intake if sodium is a concern. Compared to processed cheeses, homemade cheese tends to have fewer additives and preservatives, making it a cleaner choice.
Serving Suggestions
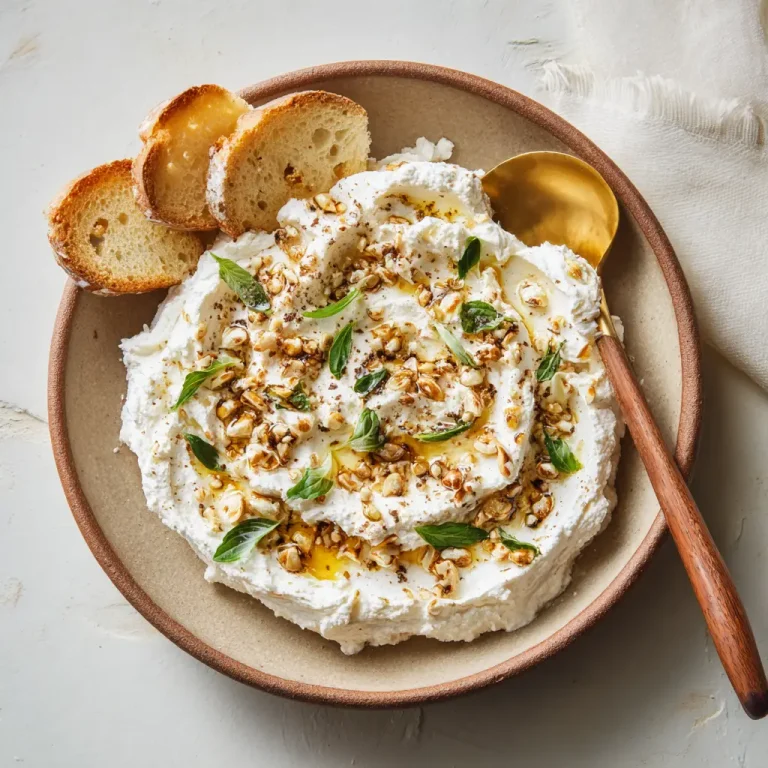
Fresh homemade cheese offers endless serving possibilities, elevating everyday meals with its creamy texture and fresh flavor. Spread it on warm toast or crackers for a simple snack. Add dollops to salads or roasted vegetables for added richness. It pairs beautifully with fresh fruit like figs, grapes, or apples for a balanced sweet and savory combination. Use it as a filling for sandwiches or wraps alongside fresh greens and tomatoes. Melt it gently over steamed potatoes or pasta dishes to enhance comfort food classics. Incorporate it into breakfast by mixing with scrambled eggs or spreading on bagels with smoked salmon. Fresh cheese also works well crumbled over soups, adding a smooth contrast to brothy bases. Its mild flavor complements strong herbs, nuts, and honey, making it a versatile ingredient in both savory and sweet recipes.

Cheese Recipe: Easy Homemade Cheese Making Guide for Beginners
Course: Blog6
servings10
minutes20
minutes160
kcalIngredients
1 gallon whole milk
1/4 cup lemon juice or vinegar
1 teaspoon salt
Optional: fresh herbs or spices (to taste)
Directions
- Heat the whole milk in a large pot over medium heat until it reaches 185°F (85°C), stirring occasionally to prevent sticking.
- Remove the pot from heat and slowly stir in the lemon juice or vinegar. Let the milk sit undisturbed for 10 to 15 minutes until curds form.
- Line a colander with cheesecloth and pour the curdled milk through it to separate curds from whey. Allow whey to drain.
- Transfer curds to a bowl, add salt, and mix well. Stir in any optional herbs or spices if desired.
- Shape the cheese by pressing it gently into a mold or bowl. Cover and refrigerate for several hours or overnight to firm up.
- Slice, spread, or crumble as desired. Store leftovers in an airtight container in the refrigerator for up to one week.
Recipe Video
Notes
- For a creamier cheese, use whole milk with higher fat content and avoid pressing too hard during draining. Experiment with fresh herbs like dill or chives to add personalized flavor.
Frequently Asked Questions (FAQs)
How long does homemade cheese last?
When properly stored in an airtight container in the refrigerator, fresh cheese typically lasts up to one week. Always check for signs of spoilage such as off smell or mold before use.
Can I use skim milk for cheese making?
Skim milk can be used but will result in a less creamy, drier cheese. Whole milk is preferred for richer texture and flavor.
What can I use instead of lemon juice or vinegar?
Other acids such as citric acid or yogurt can also curdle milk, but lemon juice and vinegar are the most common and accessible.
Is it necessary to use cheesecloth?
Cheesecloth or a clean thin towel helps drain whey effectively and shapes the cheese. Without it, draining can be messier and less efficient.
Can I add flavors to the cheese?
Absolutely! Herbs, spices, garlic, or even sun-dried tomatoes can be mixed in during the salting stage to customize taste.
Conclusion
Homemade cheese making offers a fulfilling culinary adventure that combines tradition, creativity, and simplicity. The ability to craft fresh, delicious cheese from just a few ingredients brings a sense of accomplishment and joy. This process encourages experimentation with flavors and textures, making each batch uniquely yours.