Simple Blender Hummus Recipe | Quick, Creamy & Healthy Dip
Introduction
Creamy, rich, and delightfully smooth, hummus has made its way from Middle Eastern kitchens into homes around the world. Loved for its versatility, nutritional value, and ease of preparation, hummus is more than just a dip. It’s a healthy, plant-based staple that can transform any snack or meal into something special.
Many people shy away from making hummus at home, assuming it requires fancy kitchen tools or hard-to-find ingredients. That couldn’t be further from the truth. With just a blender and a few pantry essentials, you can whip up a batch of velvety, delicious hummus in under ten minutes. No special equipment. No cooking degree required.
Whether you’re prepping for a party, looking for a healthy spread for your sandwich, or simply want a satisfying snack, this simple blender hummus recipe is a go-to you’ll keep coming back to. It’s beginner-friendly, highly customizable, and loaded with plant-based protein, fiber, and good fats.
Let’s dive into what you’ll need to make it, how to put it all together, and how you can tweak it to match your personal flavor preferences.
Ingredients Needed
Here’s everything you need to make a basic, classic hummus using a blender. These ingredients are easy to find and affordable. The table also lists the approximate calorie content for each item, so you can be mindful of your intake.
| Ingredient | Quantity | Approximate Calories |
|---|---|---|
| Canned chickpeas | 1 can (15 oz) | 350 |
| Tahini | ¼ cup | 200 |
| Fresh lemon juice | 2 tablespoons | 8 |
| Garlic (minced) | 1 to 2 cloves | 9 |
| Olive oil | 2 tablespoons | 240 |
| Water | 2 to 4 tablespoons | 0 |
| Salt | ½ teaspoon | 0 |
| Ground cumin (optional) | ½ teaspoon | 4 |
Total Calories (approx.): 811 for the full batch (varies slightly based on brand and exact quantity)
Step-by-Step Cooking Instructions
Making hummus in a blender is easy, but a few tricks will help you get that smooth, restaurant-style texture. Follow these steps and you’ll never want store-bought again.
1. Drain and rinse the chickpeas
Start by draining the can of chickpeas and rinsing them under cold water. This helps remove excess sodium and gives a cleaner taste. For extra smoothness, remove the skins by rubbing the chickpeas with a clean kitchen towel. It takes a little time but results in a silkier texture.
2. Add all ingredients to the blender
Toss the chickpeas, tahini, lemon juice, garlic, olive oil, salt, and cumin into your blender. Add 2 tablespoons of water to start.
3. Blend until smooth
Begin blending on a medium setting. Stop every 30 seconds to scrape down the sides. If the mixture looks too thick or your blender is struggling, add more water one tablespoon at a time. Continue until the hummus is completely smooth and creamy.
4. Taste and adjust seasoning
Give it a taste. Want more tang? Add a bit more lemon juice. Craving a garlicky punch? Toss in another half clove. Add a pinch more salt if needed.
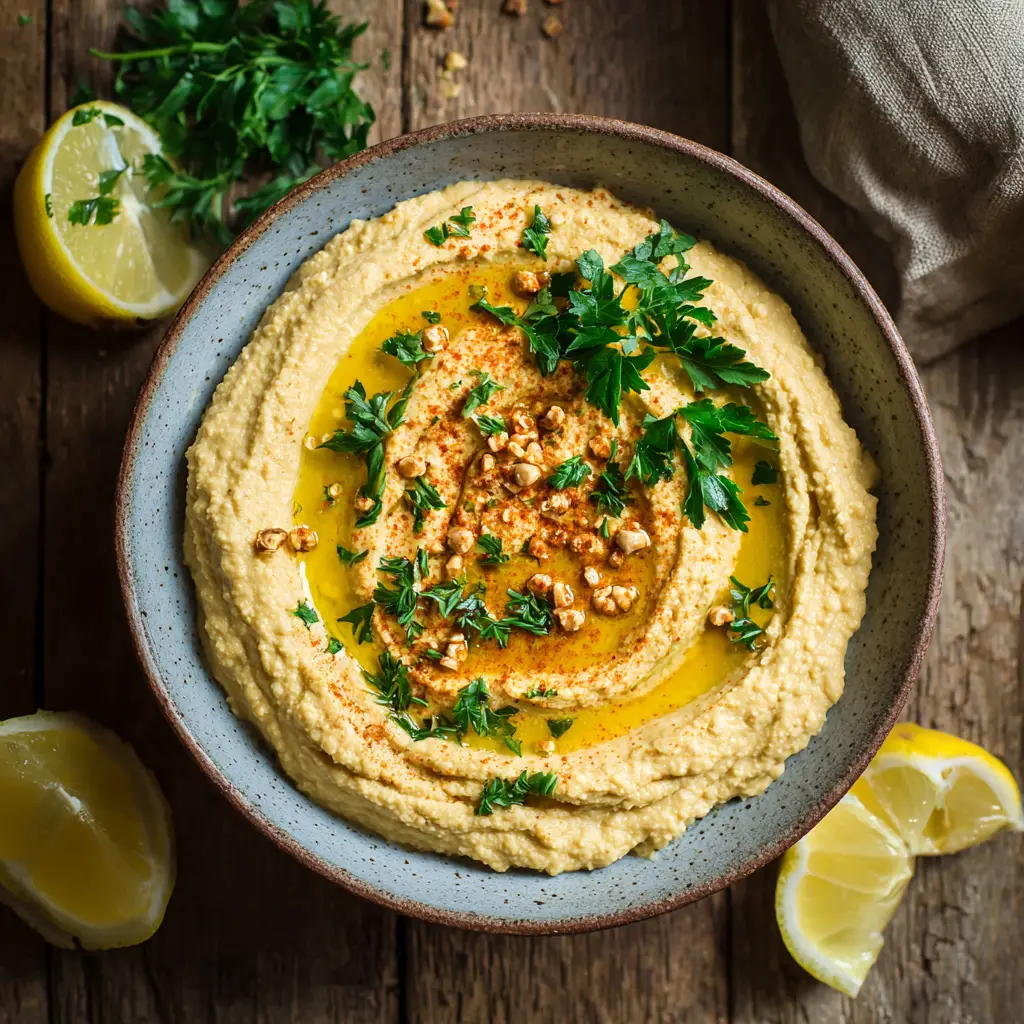
5. Serve or store
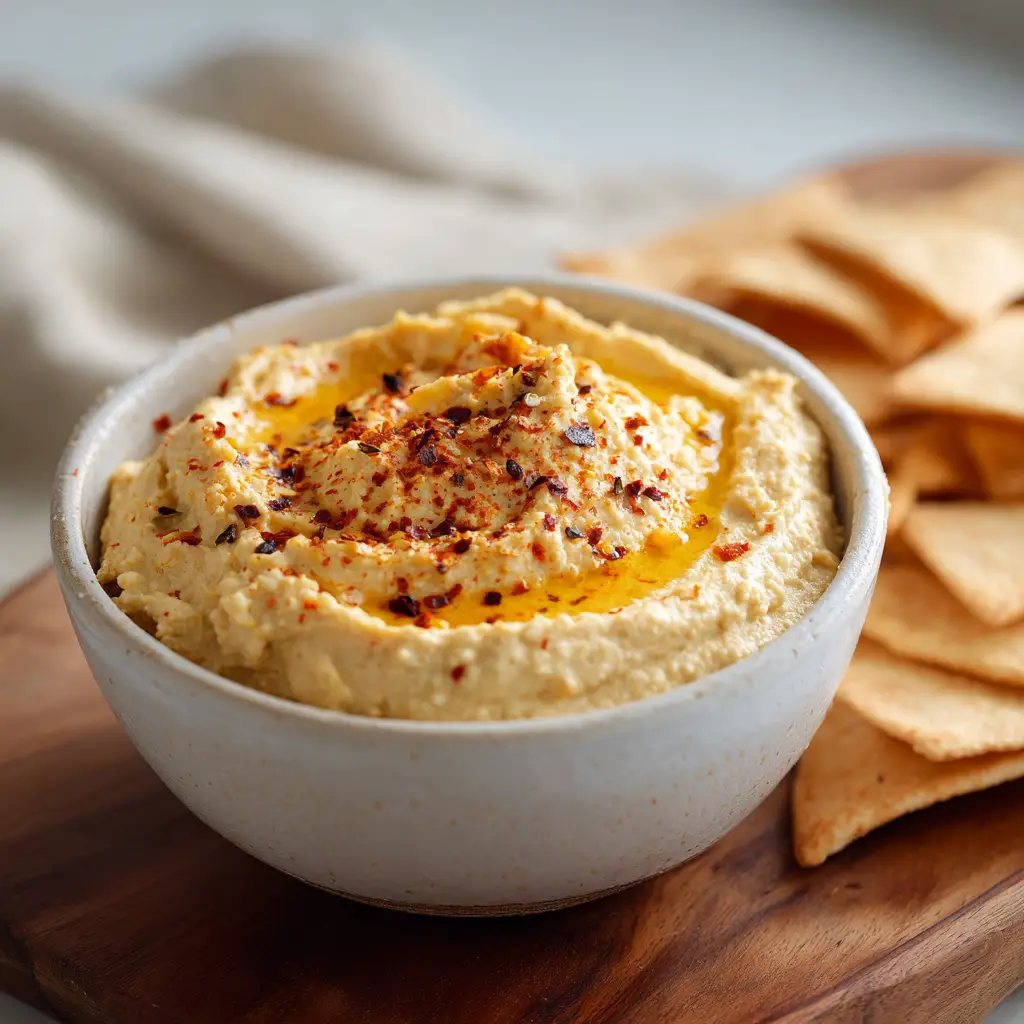
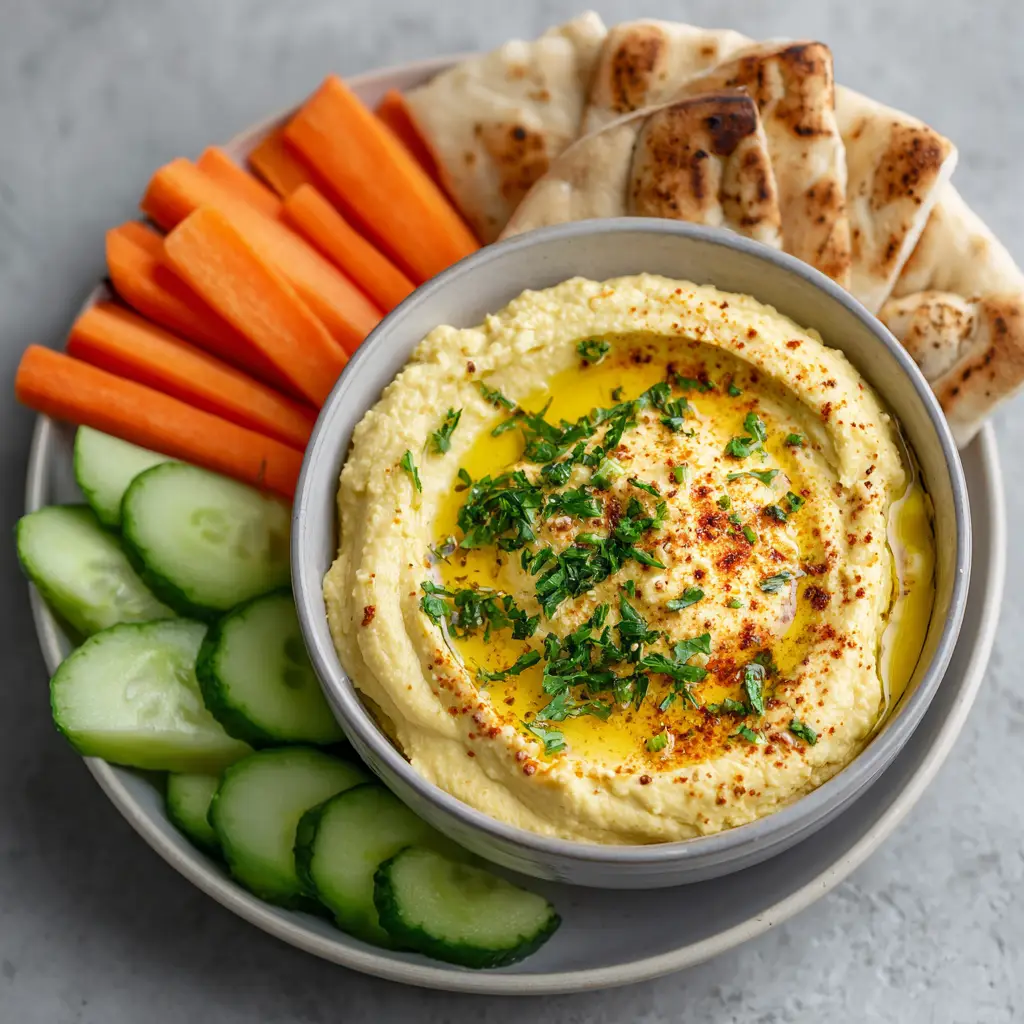
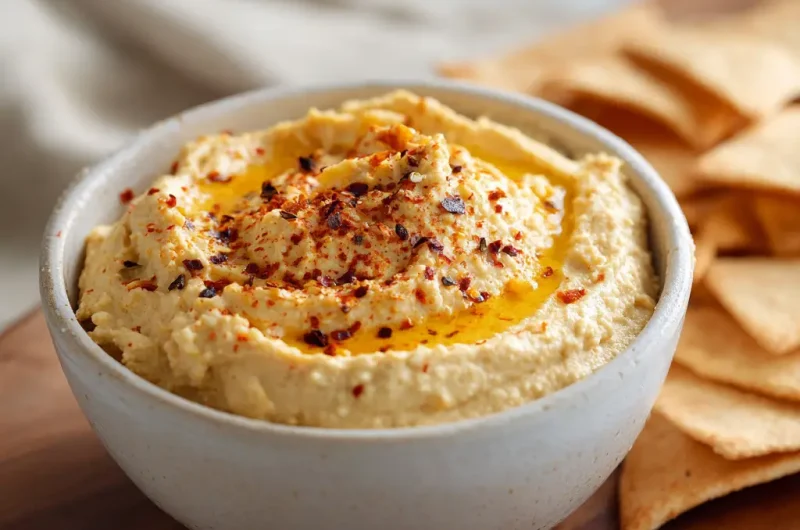
Scoop your hummus into a bowl and drizzle with a little olive oil on top. Garnish with paprika, fresh parsley, or sesame seeds if you like. Store any leftovers in an airtight container in the fridge for up to 5 days.
Tips for Customizing the Recipe
Once you’ve mastered the basic version, you can start getting creative. Hummus is the perfect base for a wide range of flavors.
Roasted Red Pepper Hummus
Add half a roasted red pepper for a smoky, sweet variation. Blend it in with the rest of the ingredients.
Spicy Hummus
Toss in a pinch of cayenne or a few dashes of hot sauce. For serious heat, blend in a slice of jalapeño or chipotle pepper.
Herbed Hummus
Add a handful of fresh herbs like basil, cilantro, or dill. This adds both flavor and a beautiful green tint.
Avocado Hummus
Mix in half a ripe avocado for extra creaminess and healthy fats. It pairs wonderfully with lime juice instead of lemon.
Beet Hummus
Blend in a small cooked beet for a vibrant pink hue and earthy sweetness. It’s especially beautiful for party platters.
Nutritional Information
Homemade hummus is a powerhouse of nutrition. Here’s a breakdown per serving (based on 8 servings per batch):
The chickpeas bring fiber and protein, while tahini and olive oil supply heart-healthy fats. It’s naturally gluten-free, dairy-free, and vegan, making it an inclusive snack for most dietary needs.
Serving Suggestions
Hummus is as versatile as it is delicious. Here are some fun and healthy ways to enjoy it.
As a dip
Serve with carrot sticks, cucumber slices, bell pepper strips, or warm pita bread. It’s the perfect addition to a veggie platter.
In wraps and sandwiches
Spread it on whole-grain bread or inside a wrap instead of mayonnaise or mustard. It adds creaminess and flavor without processed ingredients.
On toast
Top a slice of toasted sourdough or rye bread with hummus, sliced avocado, and cherry tomatoes for a quick, balanced breakfast.
With grain bowls
Dollop hummus over quinoa or rice bowls loaded with roasted vegetables and greens.
As a pasta sauce
Thin hummus with a little pasta water and use it as a creamy, protein-rich sauce for warm pasta dishes.
Simple Blender Hummus Recipe | Quick, Creamy & Healthy Dip
Course: Blog8
servings10
minutes~100–110 kcal
kcalIngredients
1 can (15 oz) chickpeas, drained and rinsed
¼ cup tahini
2 tablespoons fresh lemon juice
1–2 cloves garlic, minced
2 tablespoons olive oil
2–4 tablespoons water (as needed for texture)
½ teaspoon salt (adjust to taste)
½ teaspoon ground cumin (optional)
Directions
- Prepare Chickpeas
- Drain and rinse chickpeas under cold water. For extra smooth hummus, peel the chickpeas by gently rubbing them with a kitchen towel.
- Add Ingredients to Blender
- Place chickpeas, tahini, lemon juice, garlic, olive oil, salt, cumin (if using), and 2 tablespoons of water into your blender.
- Blend Until Smooth
- Blend on medium speed, pausing to scrape down the sides. Add more water gradually until the hummus reaches your desired consistency.
Recipe Video
Notes
- For Extra Creaminess: Use peeled chickpeas or simmer canned chickpeas in hot water for 5–10 minutes before blending.
Customize It: Add roasted red peppers, fresh herbs, or avocado for unique flavor variations.
Frequently Asked Questions (FAQs)
Can I use dried chickpeas instead of canned?
Absolutely. Soak and cook them until soft, then follow the same steps. The texture will be even creamier, and you’ll have more control over salt content.
Is a high-powered blender necessary?
No, but it helps. If your blender struggles, add more water slowly and be patient. You can also pause to let the motor rest between blends.
Can I freeze hummus?
Yes, hummus freezes well. Use airtight containers and leave some space for expansion. Thaw in the fridge and stir before serving.
Why does my hummus taste bitter?
Check your tahini. Some brands have a bitter taste. You can balance it with a little more lemon juice or olive oil.
How long does homemade hummus last in the fridge?
It stays fresh for about 4 to 5 days. Always store it in an airtight container to preserve flavor and texture.
Conclusion
Making hummus at home with a blender is easier than most expect. The ingredients are simple, the process is fast, and the end result is creamy, nutritious, and full of flavor. You can enjoy it as a dip, a spread, or even a sauce, and the recipe is endlessly adaptable to your favorite flavors. Once you try it, you’ll probably never reach for the store-bought version again.